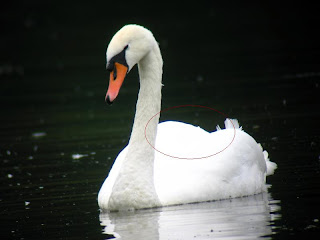
Because I am so awesome I will show you how to use it, don't worry I will use little words. The First thing you will need to do is to download the action. You can download it HERE
Extract the file and Send the location to the \Presets\Actions folder where Photoshop is installed on your computer. After that run Photoshop like you have never ran it before.
Now open your image,
You can see clearly on this picture the purple fringing around the edges of this mute swan

and a closeup

Now on Photoshop go to windows and select actions or alternatively you can press ALT & F9. This will bring up your actions window look for the one cleverly titled "purple fringe killer" click it once and beneath it there is a Play symbol hit that and away it goes a box will appear after the process, just click OK on that and here is the end results.
As you can see the purple fringing is no more

and on closeup 95% of it has now been removed

Here is also another example of the purple fringe killer in process


thank you
ReplyDeleteOh god ! I'll test it soon. But it seems to be just... great !
ReplyDeleteJust found this....Seriously, THANK YOU!!! This saved me either about and hour on photoshop or losing several really great pictures!!!!
ReplyDelete